
First, get the conditions of the discounts; the item(s) needed to buy in order to get a free item.
Example: The customer should BUY ANY food items TO GET ANY FREE alcoholic Drinks.
Once you have collected all the information you need, go to Setup>Order Entry>Discounts.
Use the image below as a starting reference:
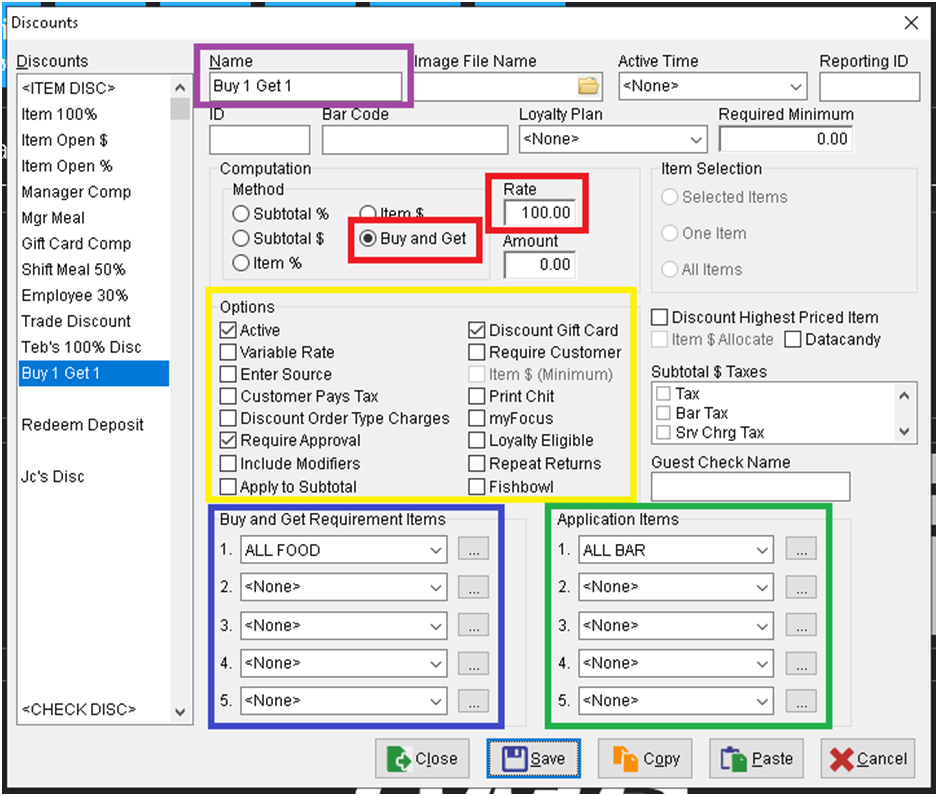
- The Name (boxed in violet) can be anything but is normally just “Buy 1 Get 1”.
- Under Computation (boxed in red), select Buy and Get then enter 100 for the Rate.
- Options (boxed in yellow) will vary depending on how the customer wants their BoGo to be setup. Some will require approval while some won’t. But Active should always be checked.
- Buy and Get Requirements refers to the items their customers need to buy in order to get #5.
- Application Items refers to the item they will get free if they satisfy all the conditions from 1 to 4.
For items 4 and 5, You need to pay attention to how the items are setup and filtered.
In the example/picture above, the filters are simple and straight forward because Menu Item Filter called ALL FOOD, where all items under the report groups: FOOD were included. Same thing for ALL BAR but this time all drinks under report groups N/A BEV, BEER and WINE are included in that filter. (see below)
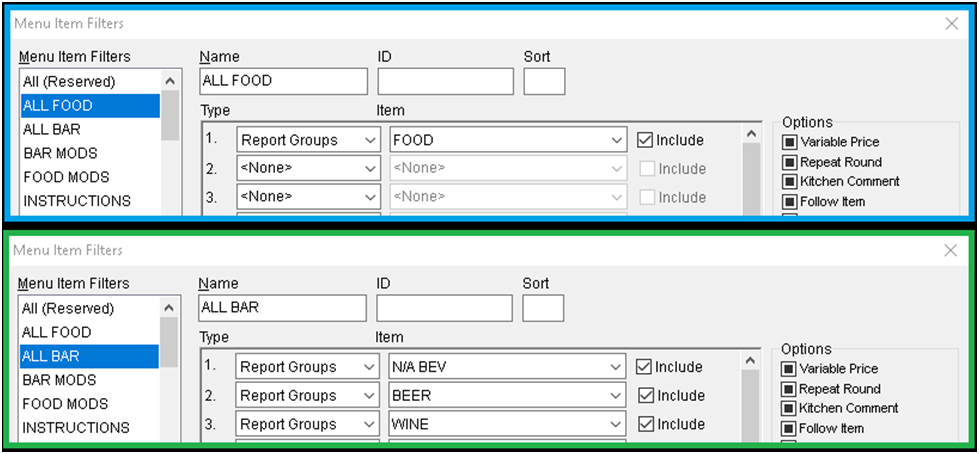
Some Restaurants a more diverse menu filters. Where it can be setup using sort codes, types, canvases, concepts, etc. That’s is why it is important to get (1) The Items required and the (2) free items so we can see how they are filtered/grouped together.
Once you have created the Discount, the last step would be creating the button for it under Canvas Designer and give it a go. This is what it should look like: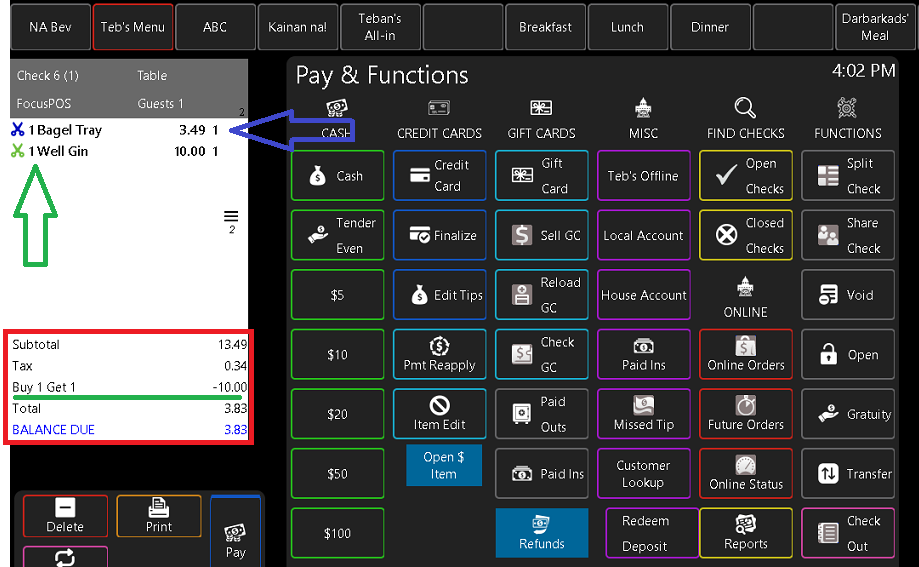
The Bagel Tray food item was bought along with Well Gin. The latter became free when the discount was applied.
Comments
0 comments
Please sign in to leave a comment.