
FocusOnline Setup
Updated 6/29/2020
FocusLink can be installed before or after doing store level setup but MUST be done before you onboard the location for FocusOnline. A FocusLink connector license must be provisioned prior to setup.
Install FocusLINK on the FOCUS computer. Find installation instructions at: https://focuspossupport.zendesk.com/hc/en-us/articles/360038761811-Focus-Link-Installation
In Focus Setup...
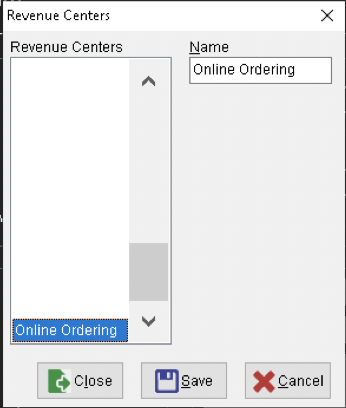
- Create a new Revenue Center called Online Ordering. You will want to note the position number being used as you will need this information when you enter the onboarding information.
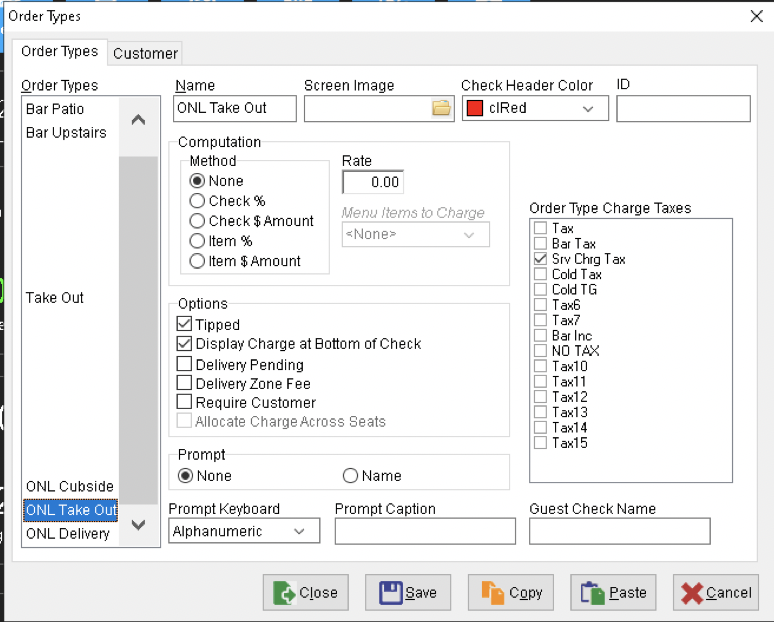
- Create at least one new Order Type that will be used for online ordering. It can be named 'Online Order', 'Online Pickup', 'OLO Togo', or 'ONL Take Out' as examples. Additional order types can be set up however MUST be defined in the online setup as well.
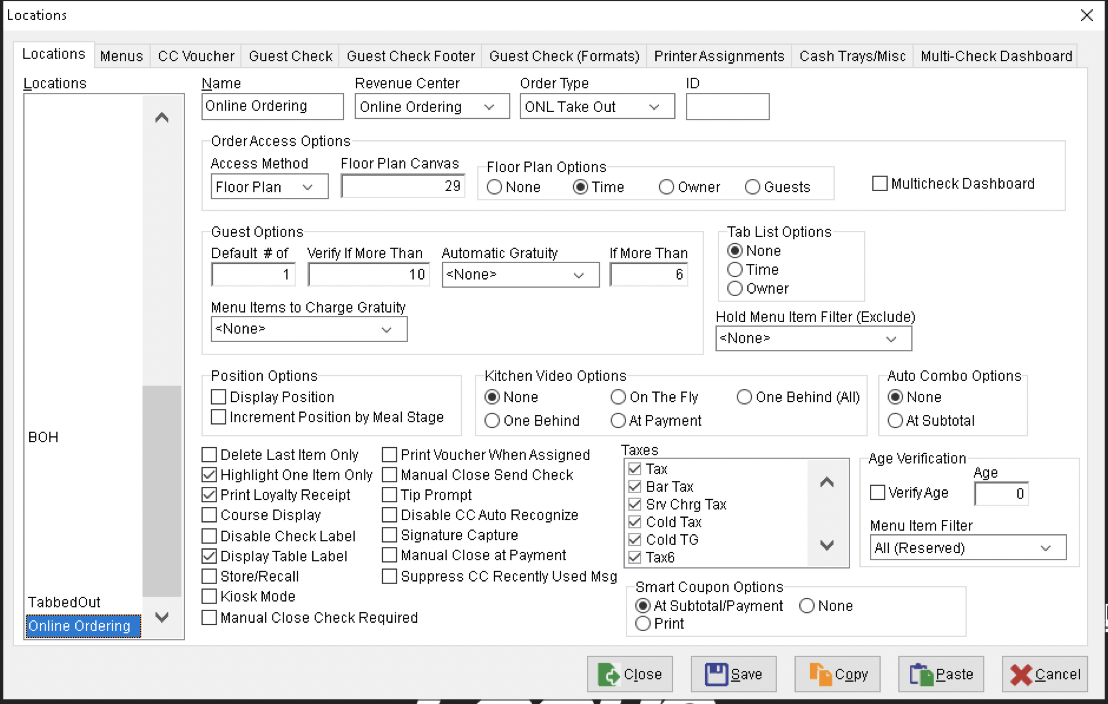
- Create a Location called Online Ordering with the Revenue Center set to Online Ordering and Order Type set to Online Orders (this will be the default Order Type used unless additional options are set up).
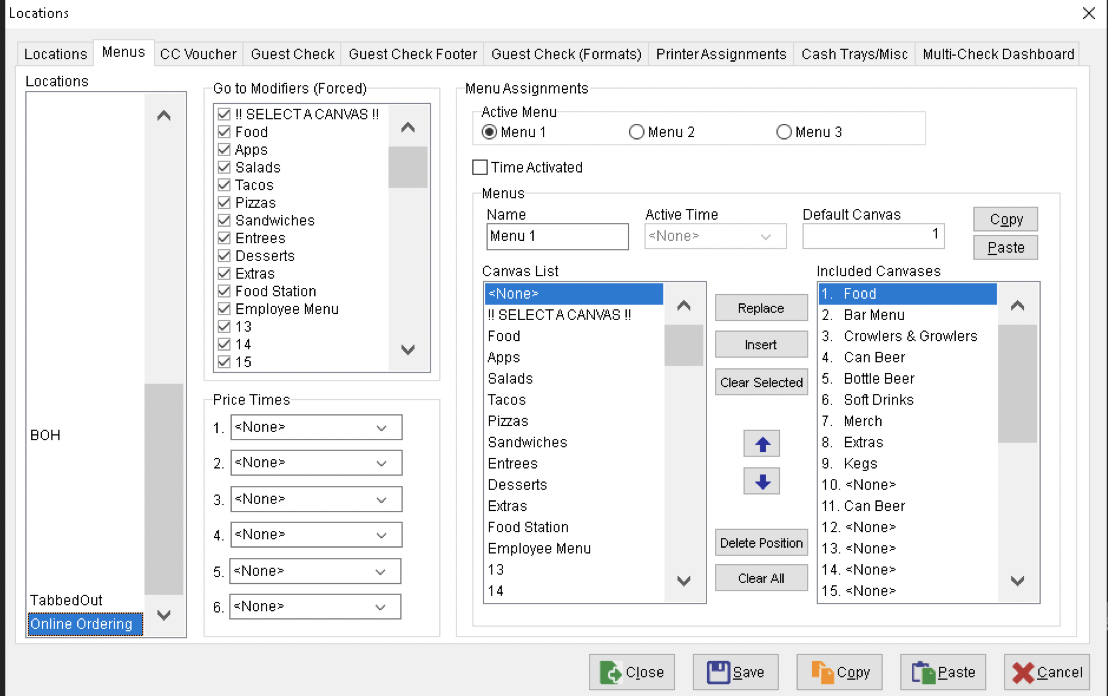
- On the Menus tab add the canvases you want available online to the ‘Included Canvases’ section. Note you can also build custom Groups online once items are uploaded to the cloud.
- On the Printer Assignments tab set your printer routing.
**Best Practices**
Set all items to print somewhere. Items like drinks, salads, soups, etc that might not print for dine-in orders need to print for online orders so they are not missed.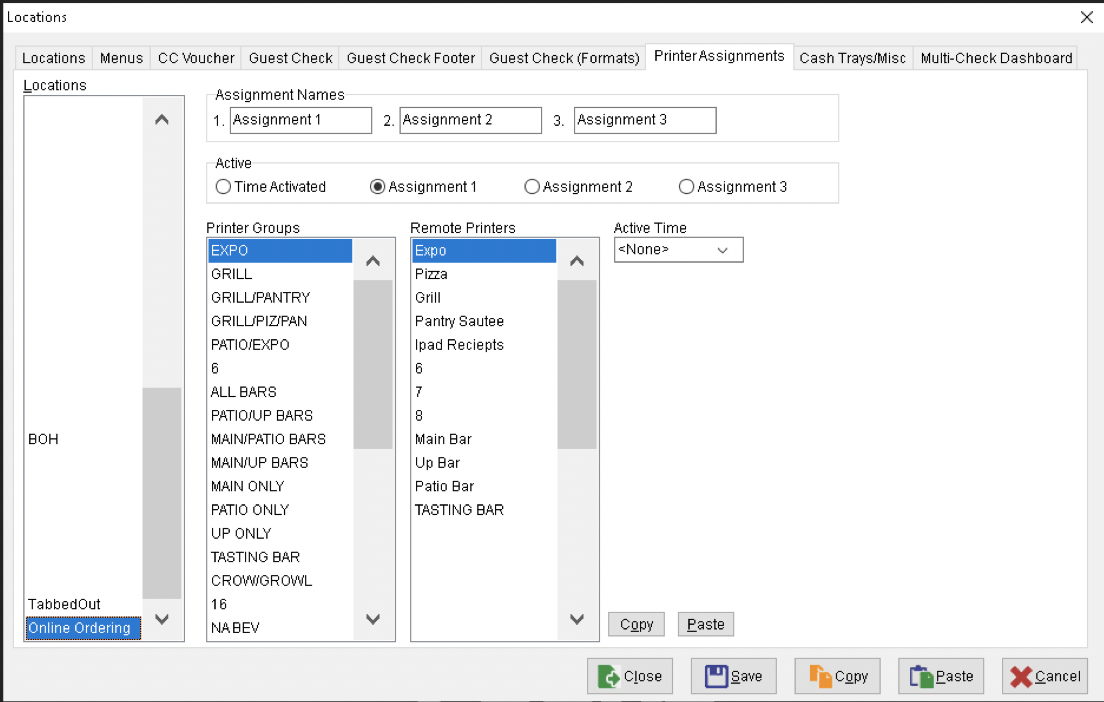
- On the Menus tab add the canvases you want available online to the ‘Included Canvases’ section. Note you can also build custom Groups online once items are uploaded to the cloud.
- In Jobs, create an Online Orderer job with Location set to Online Ordering and the following Job Rights turned on:
✅ Ring - Own Checks
✅ Ring - Other’s Checks
✅ Payments - Tender Other's Checks
✅ Transfer - Automatic Pending
NOTE: This Job’s Location is the one uploaded to the cloud.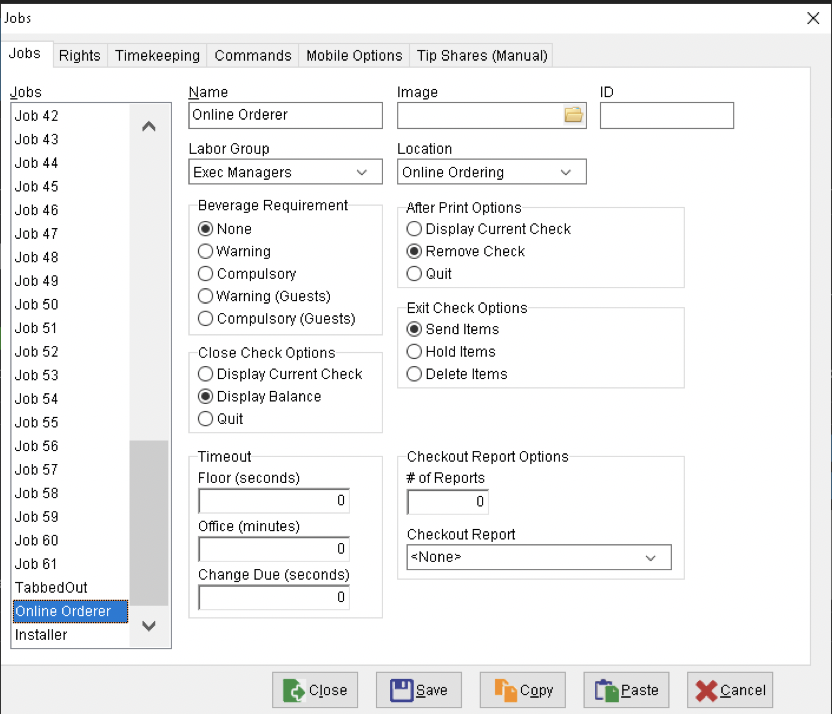
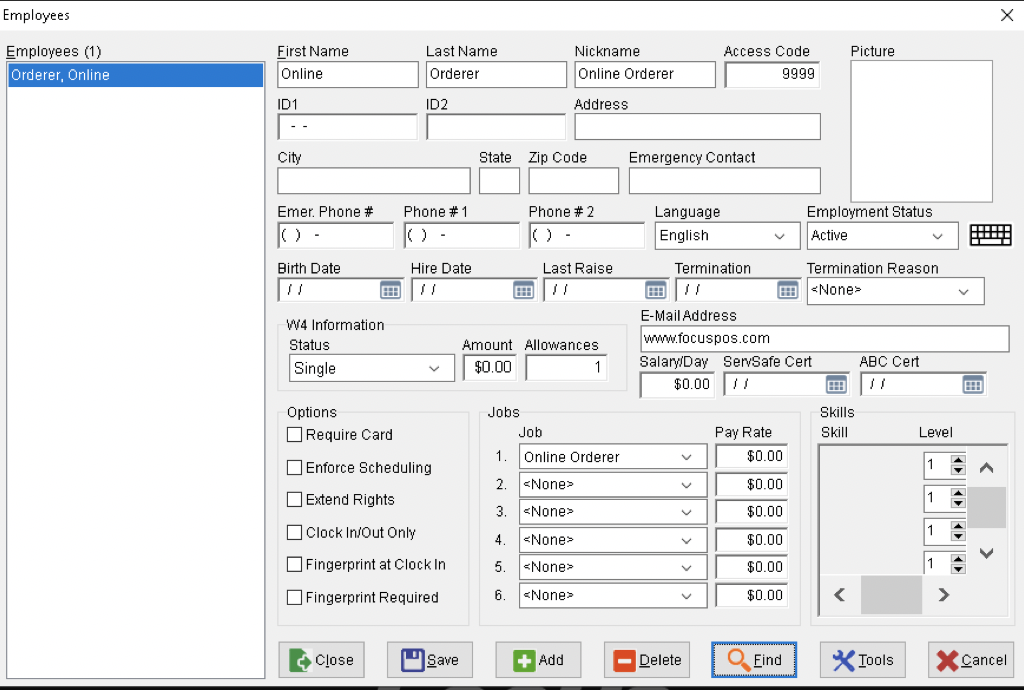
- In Employees, create an Online Ordering employee with the Job of Online Orderer.
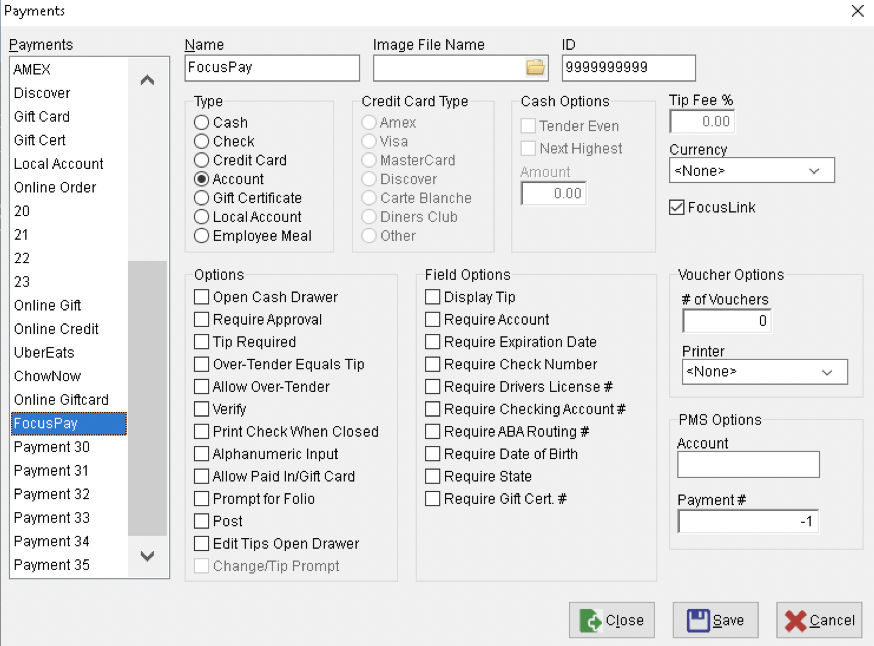
- Create a Payment called FocusPay. Set the ‘Type’ to Account and select the FocusLink checkbox option.
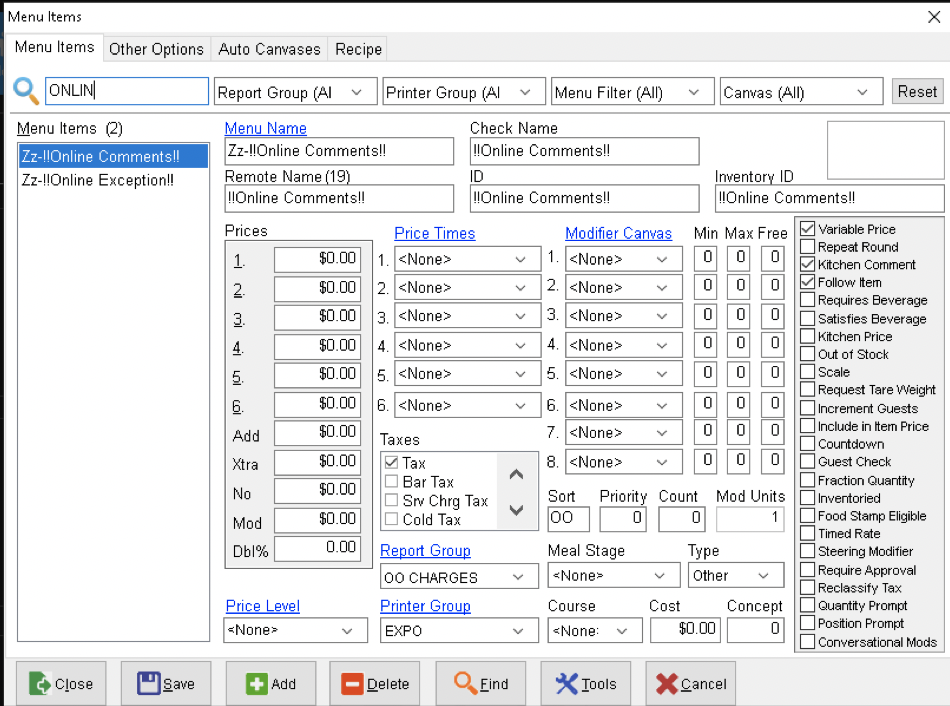
- In Menu Items, create an online orders Menu Item Exceptions and Menu Item Comment items. Ensure these items have 'Variable Price', 'Kitchen Comment' and ‘Follow Item’ checked.
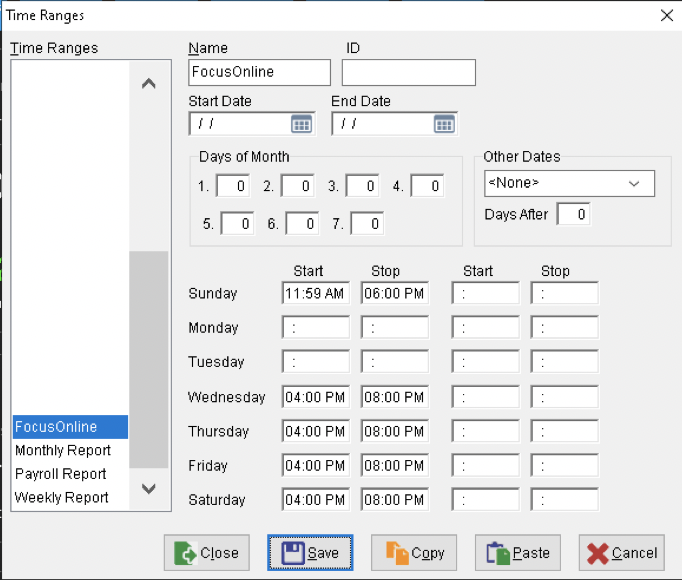
- In Time Ranges, set the active order times. Create a time range named “FocusOnline” (this is case and spelling sensitive) and input the time frames orders are accepted for each day.
- Configure the following sections in Miscellaneous-General-General tab settings:
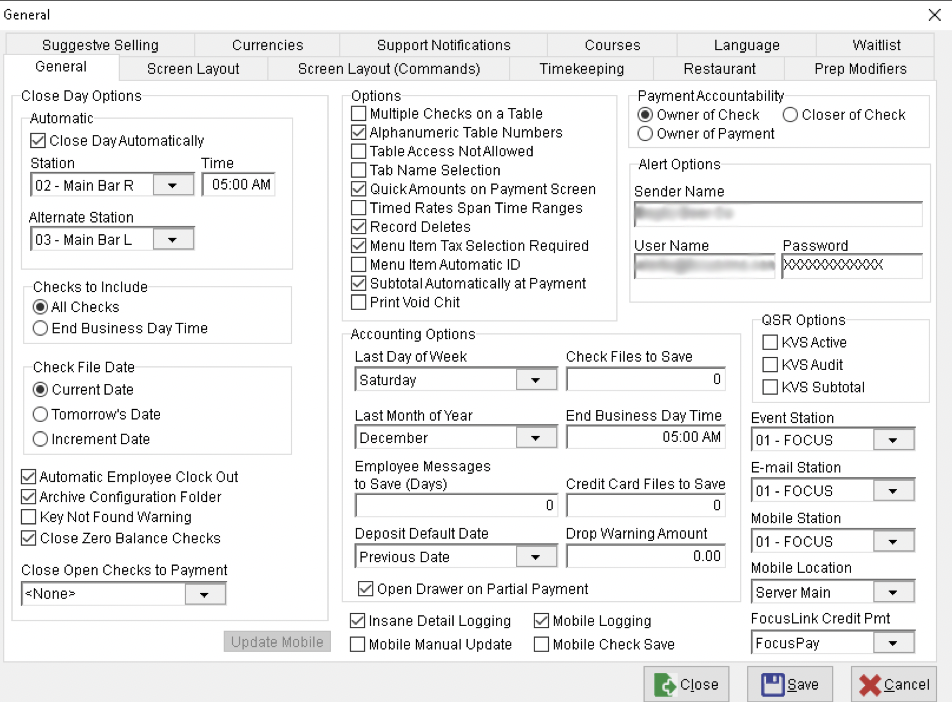
- Mobile Station – Must be a station running in front of house (not in Setup).
- Mobile Location – If set to ‘None’ change this to your Online Ordering location. If you are using Mobile/FocusOn, leave the location set.
- FocusLink Credit Pmt – Set this to the FocusPay payment you created.
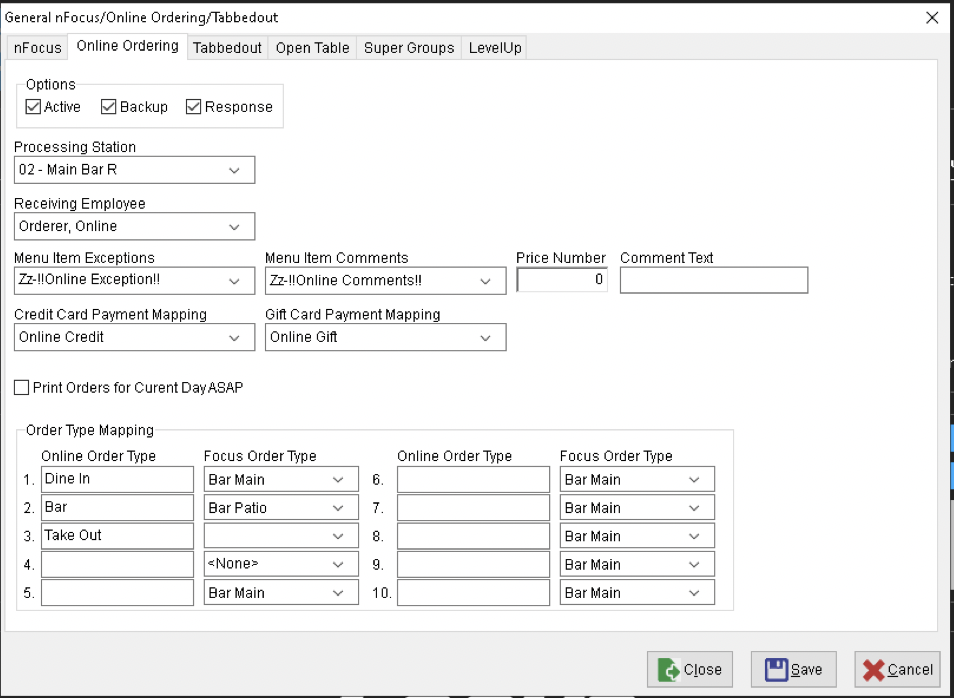
- Configure the following Miscellaneous-nFocus/Online Ordering/Tabbedout settings:
- Check Active, Backup, and Response.
- Processing Station – Must be a station running front of house.
- Receiving Employee – Set to Online Ordering employee.
- Menu Item Exception – Set to menu item created for this.
- Menu Item Comment – Set to menu item created for this.
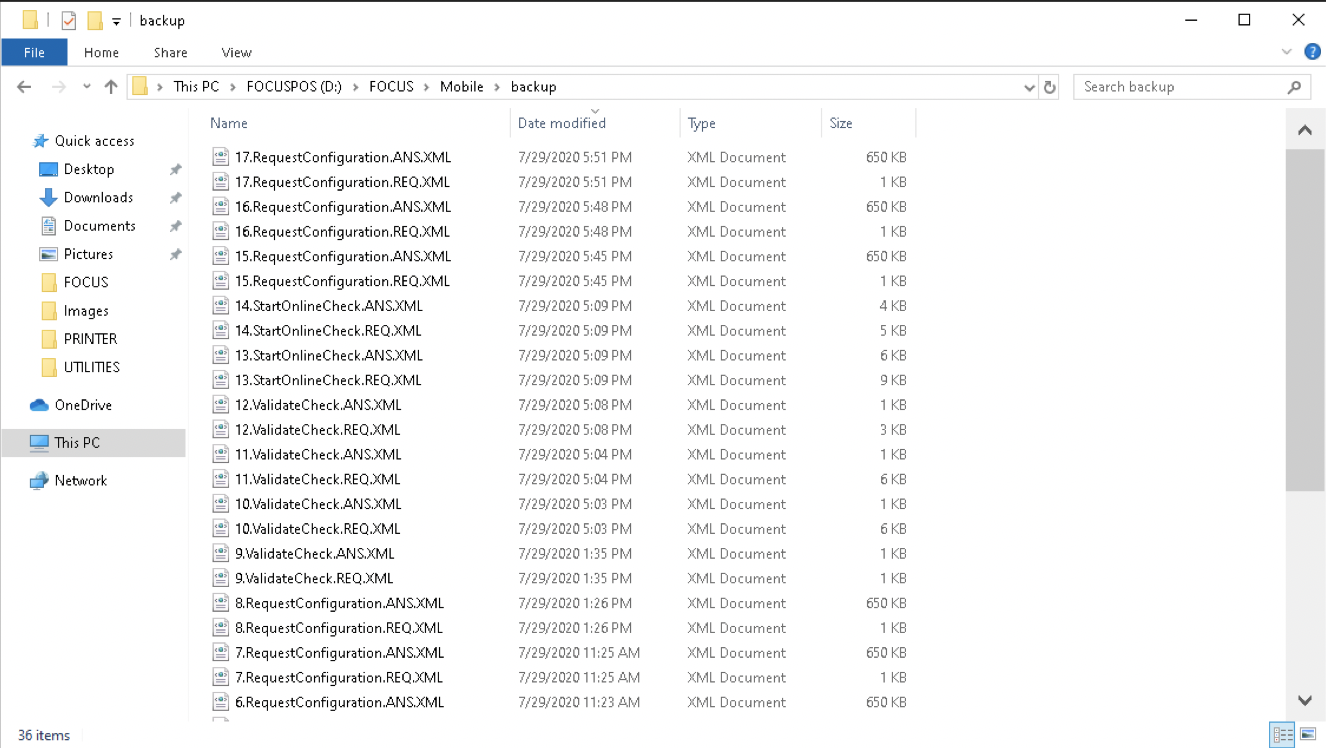
- Create a folder named 'backup' in the FOCUS\mobile folder. This will allow you to capture backup copies of all data requests and answers between FocusOnline and Focus.
Comments
0 comments
Please sign in to leave a comment.