FocusOnline At Table Settings
@Table in FocusOnline allows restaurants and bars to create QR code ordering links for tables so guests can open a check online and close it out when they are done.
The first setup step is to create a Dine In order type in FocusOnline.
- Navigate to the FocusOnline Admin Portal.
- Go to Settings > Order Types.
- Select the Add Order Type button. A new order type will be added to the bottom of the list.
- Click on the new order type to show the settings.
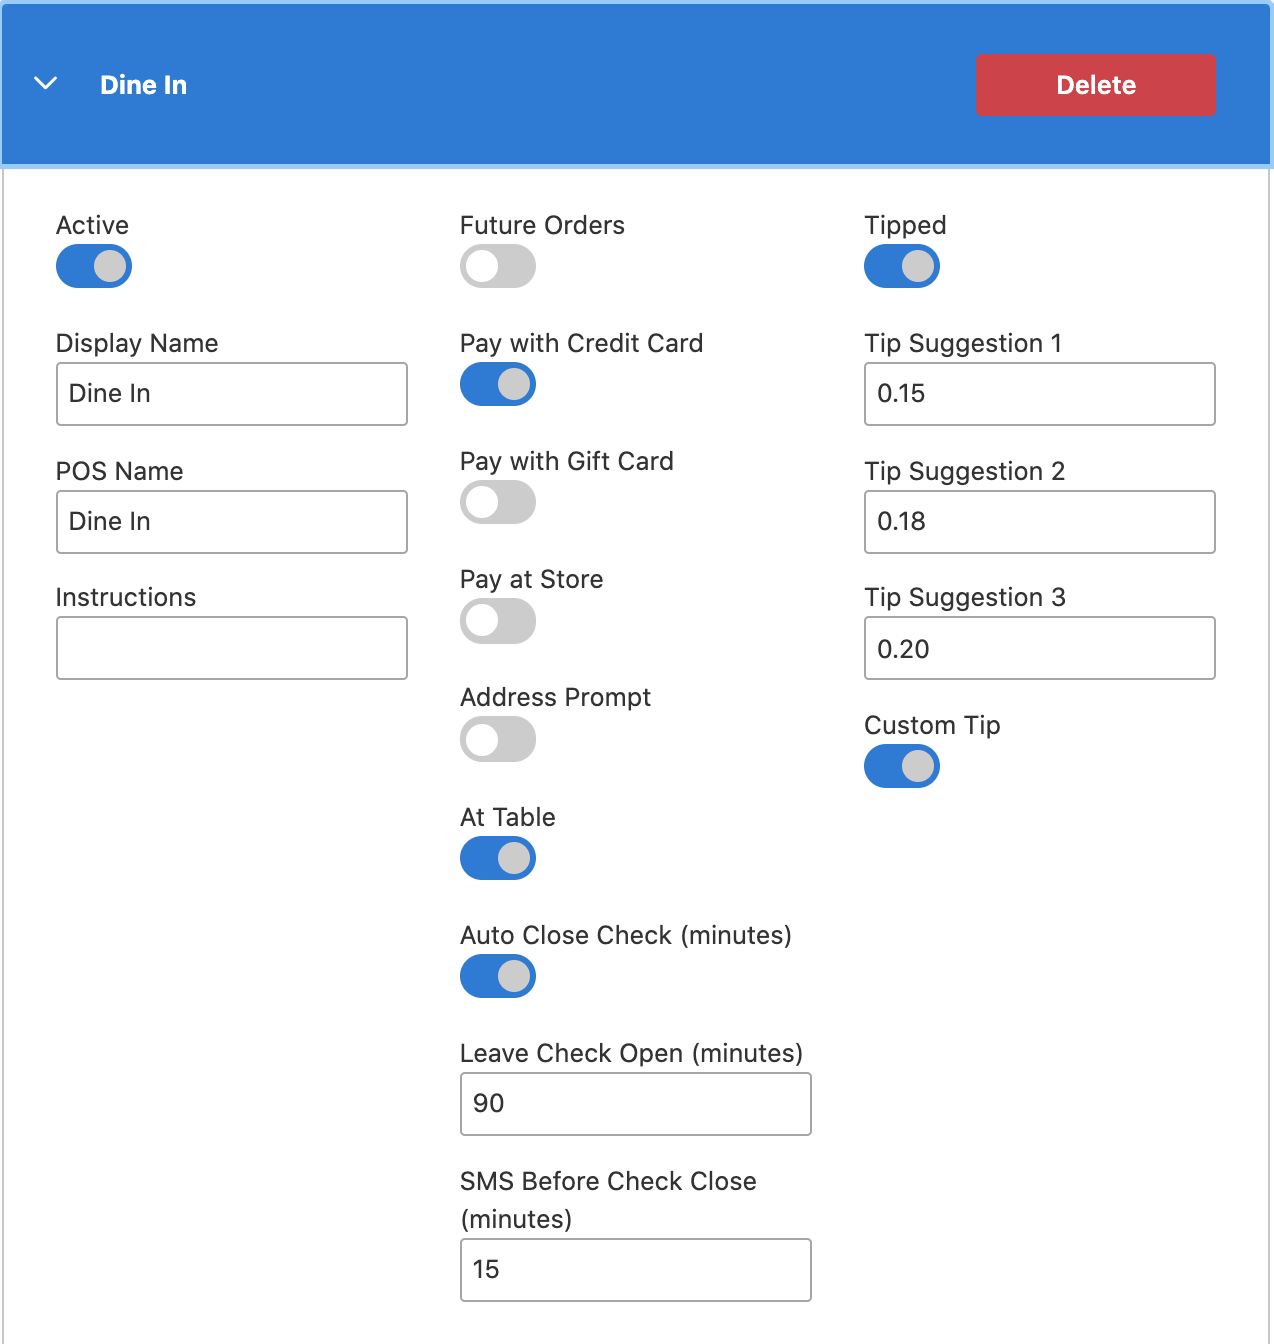
- Name the order type and fill out all settings options as needed.

- Set to Active.
- Set Display Name to Dine In.
- POS Name should be the order type in Focus at the store level that the orders should be saved as.
- Instructions allow you to give guests additional information.
- Future Orders controls whether that order type is allowed to have orders placed for future dates/times.
- Payment options allow you to control what types of payments can be accepted for the order type.
- Address Prompt turns on the prompt for an address with the order.
- At Table turns on the option to leave a check open and then also gives you the option to auto-close the check.
- Auto Close Check turns on the ability to close the check automatically after a period of inactivity.
- Leave Check Open (minutes) is the amount of time the check will be left open.
- SMS Before Check Close (minutes) allows you to specify when a guest receives a text notification that their check is going to close.
- Set Tip options as needed.
Select Save from the top left corner when done adding the new order type. Once saved, refresh the page.
Your next step is to create a Custom Menu for Dine In. This will allow you to specify which menus you want to make available to your guests.

- From the Admin Portal navigate to Settings > Custom Menus.
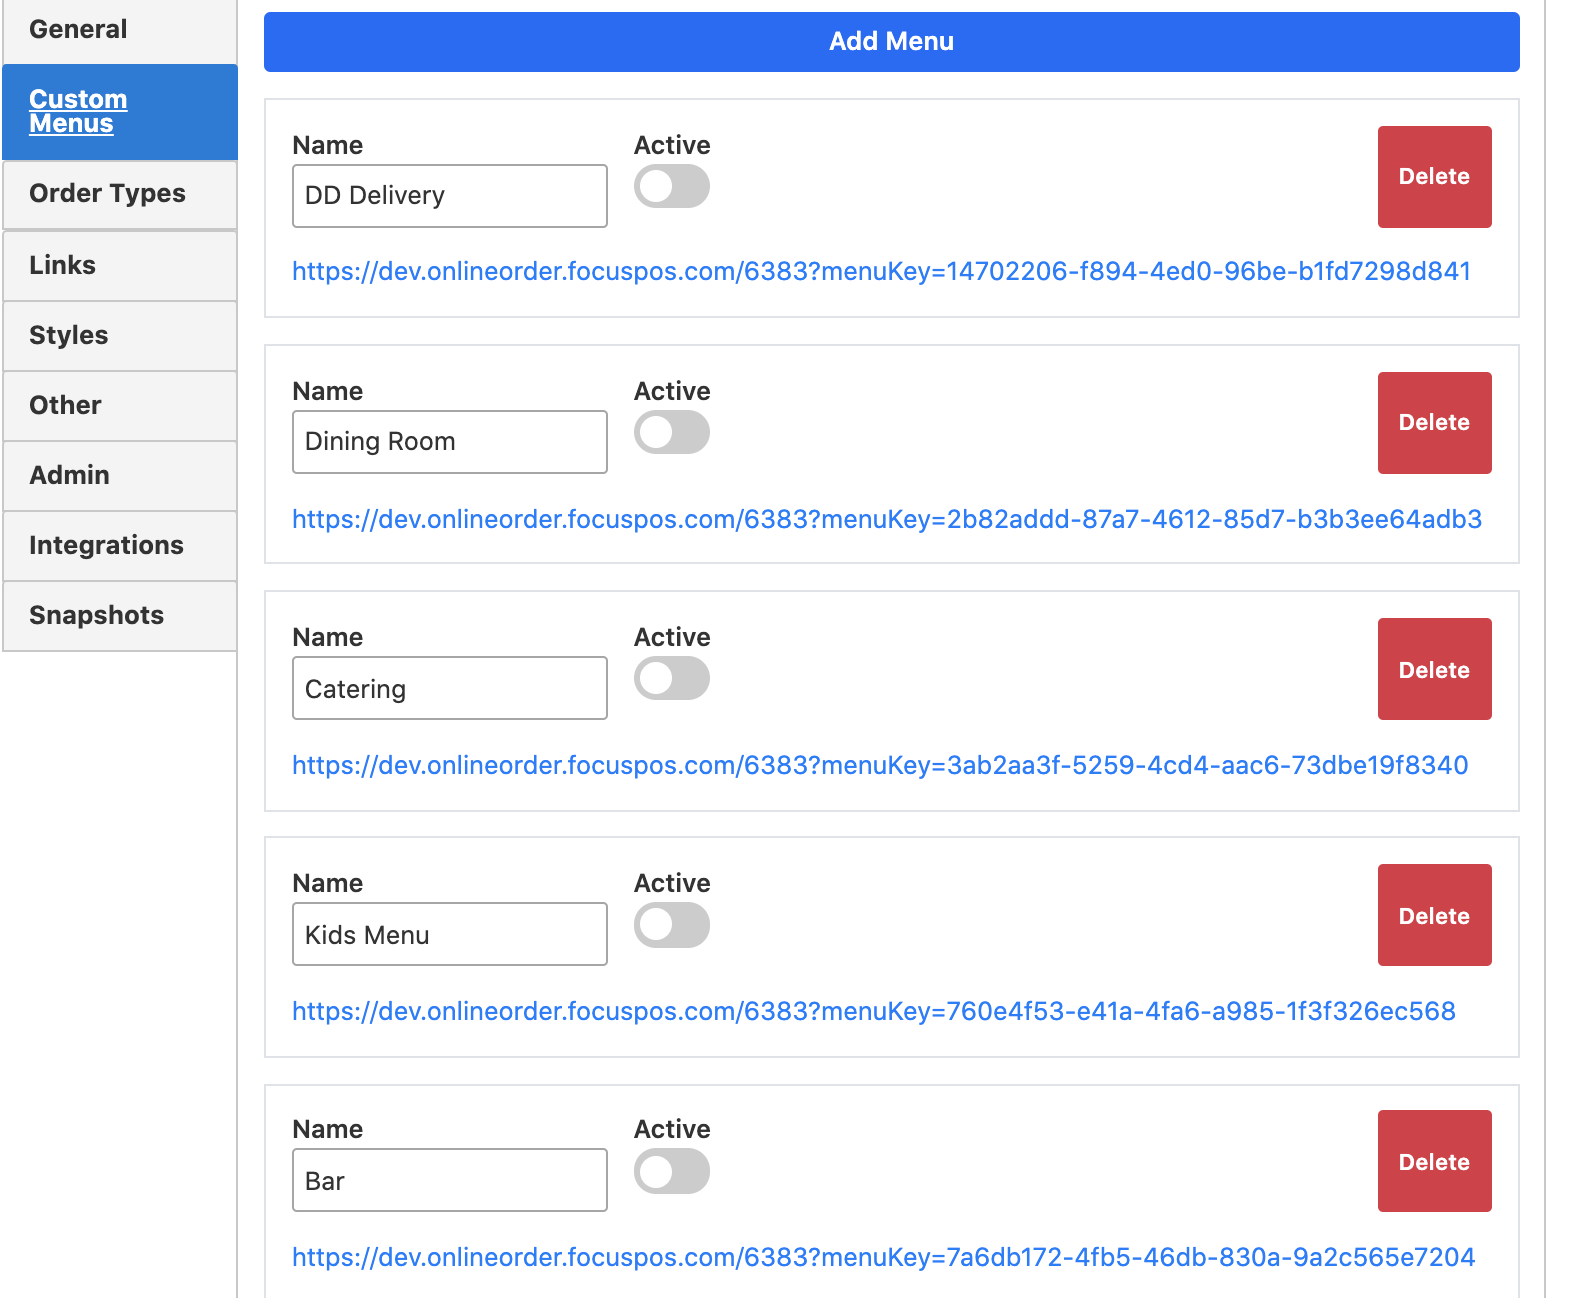
- Click the Add Menu button from the top and a new one will be added to the bottom of the list with the name New Menu.
- Rename the menu as something descriptive for the area you will be using it for (ie: Dining Room, Bar, Patio, Dine In). If different menus are offered based on the area you may need to create more than one Custom Menu. You can leave the Active toggle set to OFF.
- Select Save in the top left when you are done defining your menus.
- Navigate to Menu.
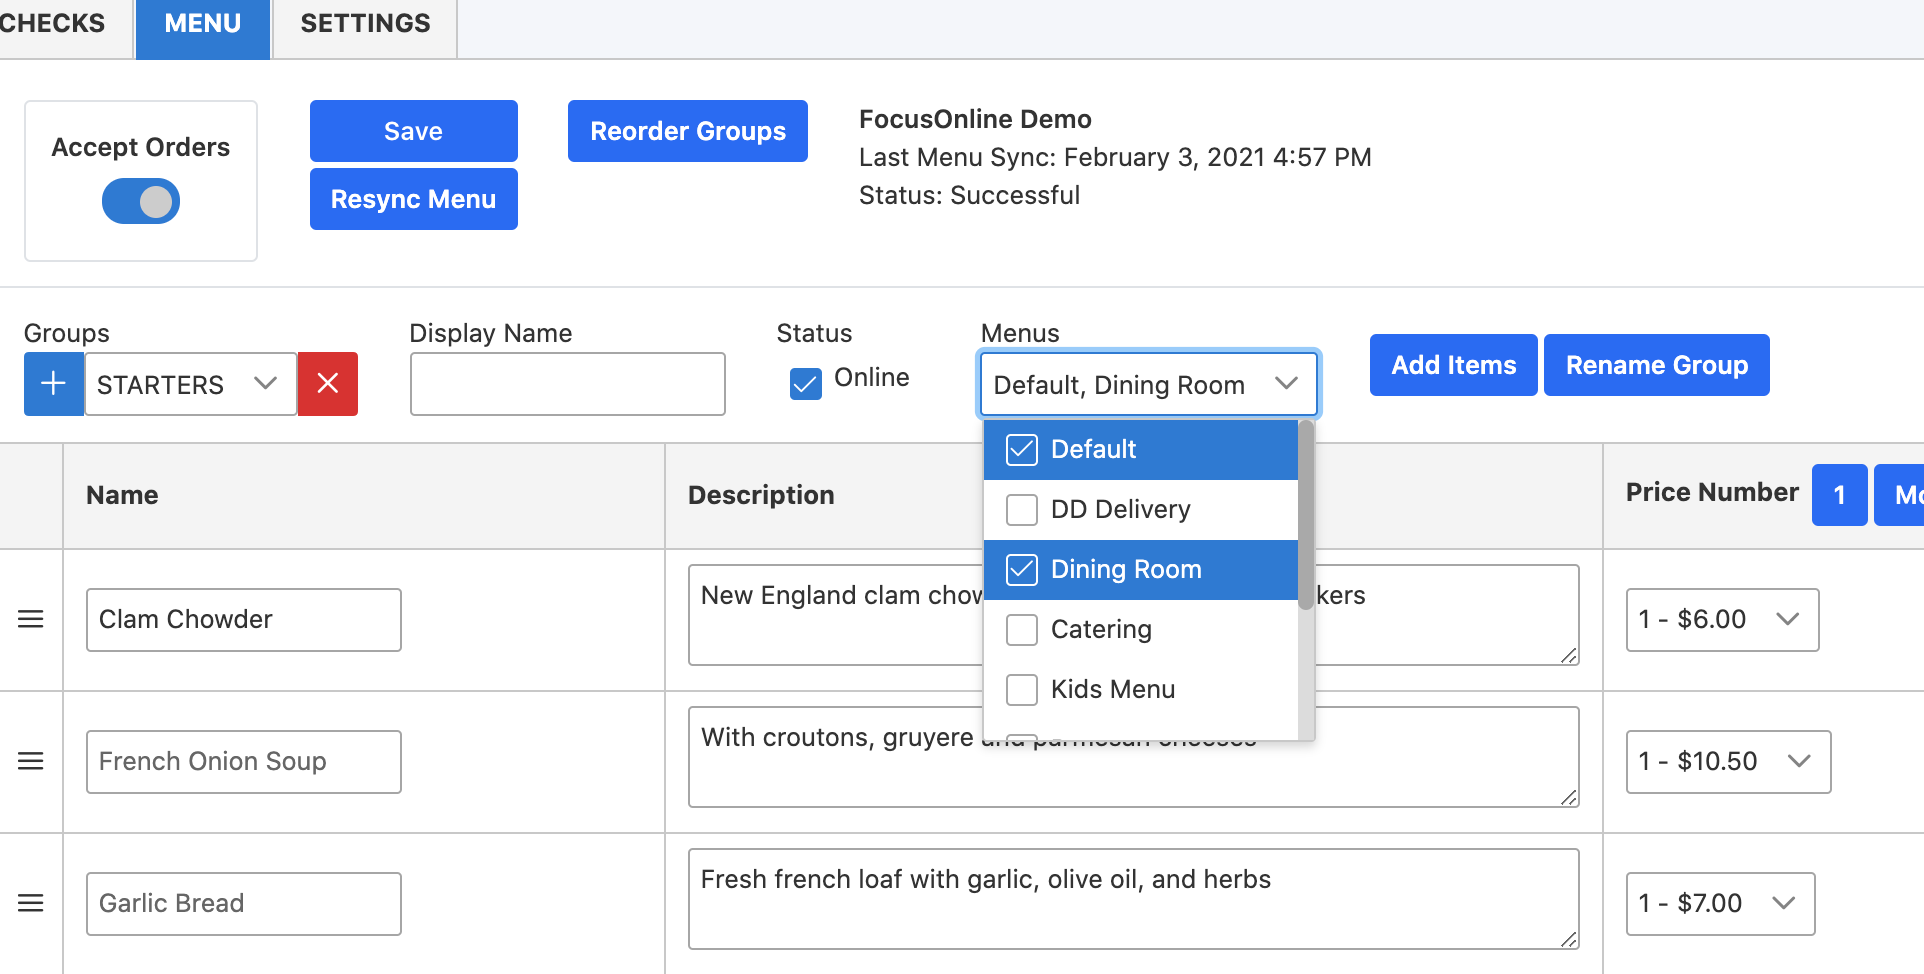
- Drop down the Groups list and select a group you want to add to your new custom menus.
- Drop down the Menus list and mark the check box next to each of the Menus you want that Group to display on.
- Continue steps 6 and 7 until you have updated all groups that you need.
- Select Save at the top.

The last setup step is to create Links for each table. These links will be used to create QR codes the guest can scan with their phone.

- Navigate to Settings > LInks.
- You may add one or multiple links at a time.
- Add Single
- Enter an ID name, which is the table number/name.
- Select Add Link.
- Add Bulk
- Enter the starting number.
- Update the number of IDs to create.
- If needed, you may add a prefix letter or number.
- Select Add Links.
- Add Single
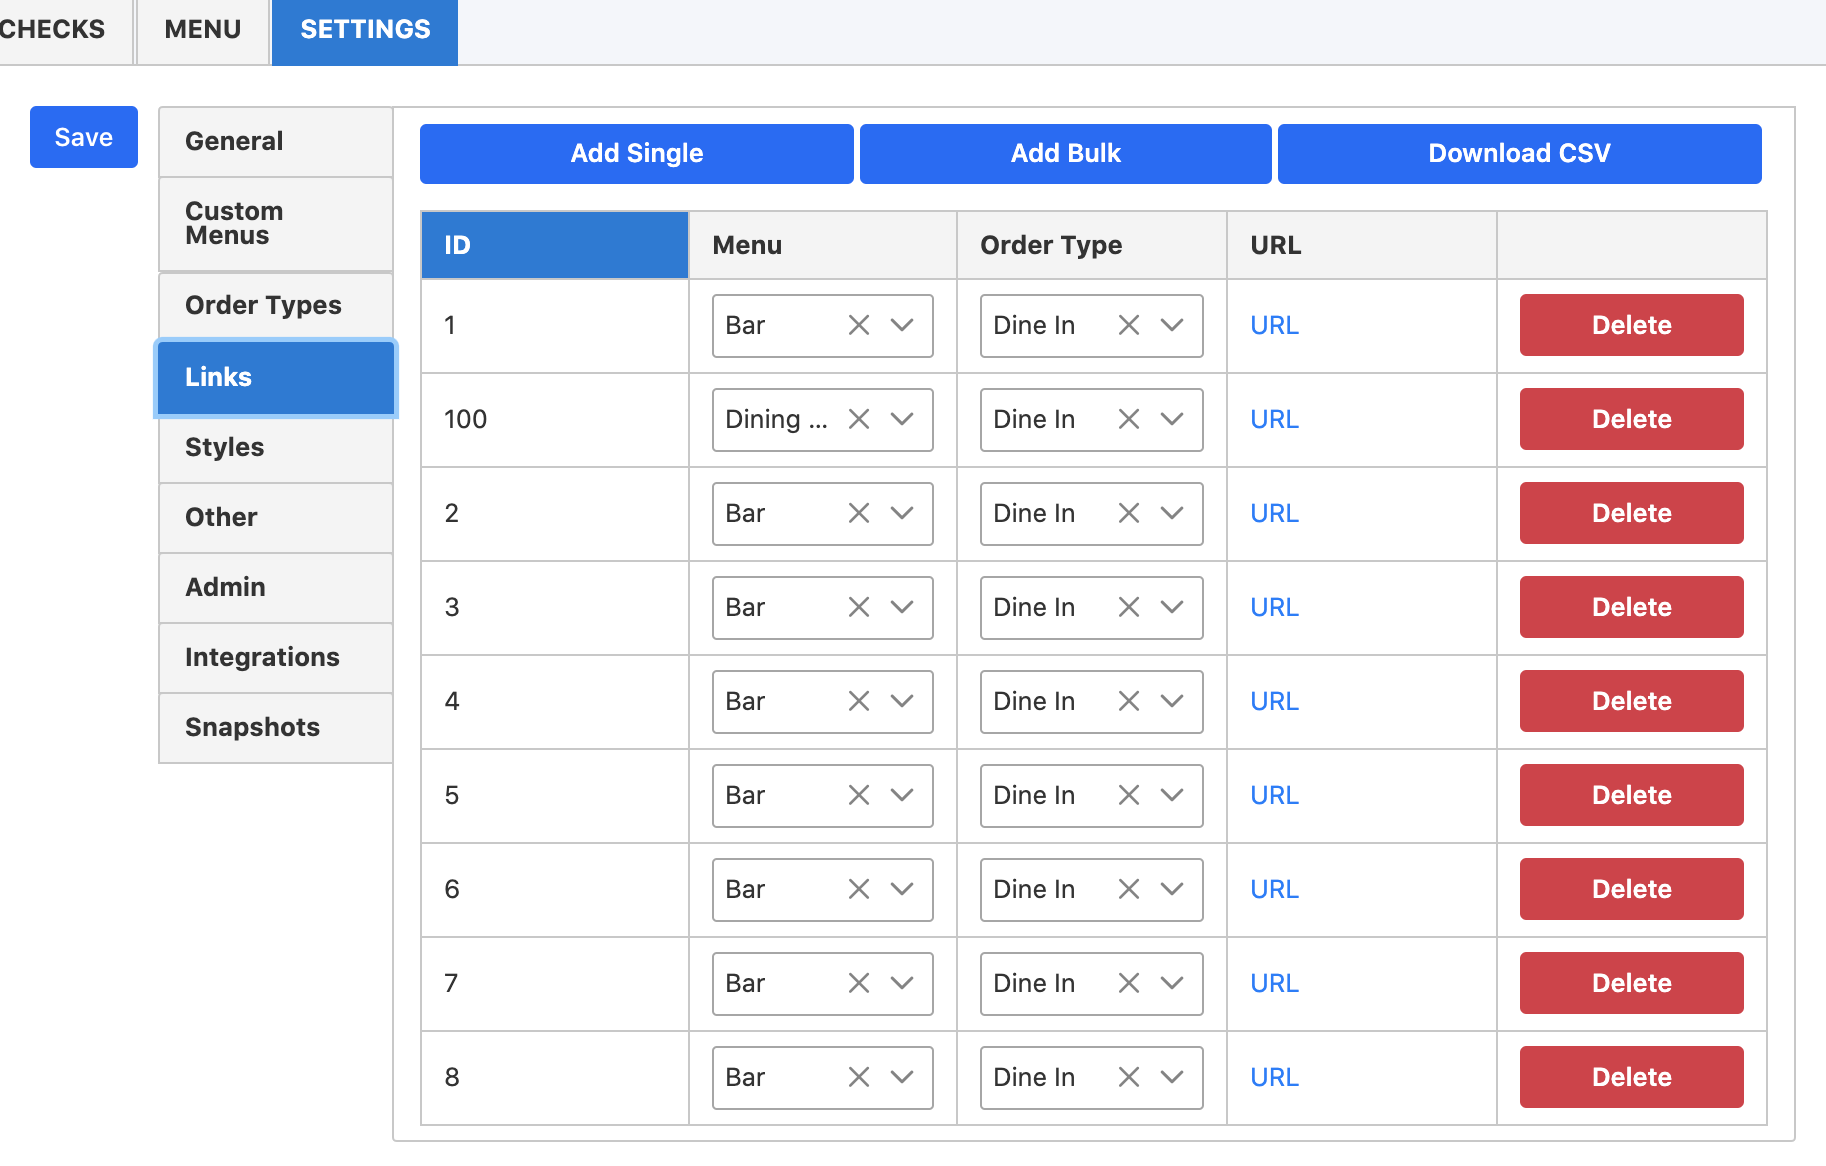
- For each link, specify the Menu and Order Type tied to the ID.
- You may click URL to access the unique link for the ID. To download all the URLs, select Download CSV.
You may use the URLs to create QR Codes online or provide the CSV file to a printing company to create stickers or table tents.

Comments
0 comments
Please sign in to leave a comment.